Hmmm... I appear to have mislaid the photos for this one. (which is an excuse for it being a day late... It's not the reason, but it's an excuse)
Anyhoo - mint cremes!
You need:
Fondant Icing (the ready made roll out stuff for ease)
Peppermint Essence
Dark Chocolate
Knead the icing until soft and pliable.
Add several drops of mint essence and continue to knead
Roll the icing into a cylinder, about 1 inch in diameter
Taking a very sharp knife, slice circles about 1/3 inch thick
Leave the icing circles to dry out for an hour or so.
Melt the chocolate over a bowl of hot water.
Dip the icing into the chocolate and coat completely (don't leave it in too long. You don't want to melt the fondant!)
Let the mint cremes set completely on a non stick sheet.
You could add colouring and other flavours to the icing.
I made some purple strawberry cremes as well, but they were, quite frankly, disgusting.
But in other news, the strawberry jam was absolutely delicious!!
Showing posts with label Sunday's Sweets. Show all posts
Showing posts with label Sunday's Sweets. Show all posts
Monday, 13 May 2013

Sunday, 5 May 2013
Sunday Sweets - Adventures in Icing
The delightful Ina Garten has inspired me to decorate cookies...
Beautiful cookies...
I used the following recipe for the cookies:
4oz very soft butter
6oz caster sugar
1 egg
1/3 tbsp vanilla extract
8oz plain flour
2/3 tsp baking powder
1/4 tsp salt
Beat the sugar and butter together until well combined, and light and fluffy. Then beat it a bit longer. Just for fun.
Mix in the egg, then the vanilla.
Sift the dry ingredients together over the bowl. Mix to form a loose dough.
Form into a ball, wrap in cling film and chill for a couple of hours.
When firm, roll out on to a VERY WELL floured surface. If you think there's just enough flour on there, sprinkle a bit more on... this is a soft dough and will stick like billy-o.
Dip the cookie cutters into flour before pressing out the shapes.
Line baking trays with a non-stick sheet, and lay out the cookies.
(You can refrigerate again at this point. This stops the cookies from spreading in the oven, and it also means you can get some of the prep done the day before if you need to)
Place into a pre-heated oven (temp 180oC) until lightly golden brown.
When cooked lay them onto a rack to cool completely before icing.


Making the icing - use Royal Icing for this, it contains egg whites so sets beautifully hard and shiny. You could make it from scratch using icing sugar and raw egg whites, or you can cheat and use the boxed Royal Icing, which is so much easier!
Mix the icing with enough water to make a very thick, but still runny paste. This is about 125g icing sugar to 35ml water and a splash of lemon juice. The consistency you need here is runny enough to drip off the spoon in ribbons, but firm enough that the ribbons remain on the surface of the icing (you can just see that in the photo below, these were still here after about a minute)


Leave the outline to set for about 5 minutes - when it's dry to the touch you can flood the centre. The icing used to flood is much runnier than the outline icing. This can be spooned in - but don't make it too runny or you can control it. You can use a paintbrush (preferably a clean one!) to manipulate the icing into all the edges. I used an icing stick.

Leave this to set completely if you plan to decorate on the top. This takes hours to go really hard.


As you can see, I had a great time!
I also made the lines thinner.


These were made by adding drops of icing to the flooded parts before it
had set. This gives a smooth finish with no bumpy outlines. You can drag
a cocktail stick through it for a feathering effect.


Beautiful cookies...
I used the following recipe for the cookies:
4oz very soft butter
6oz caster sugar
1 egg
1/3 tbsp vanilla extract
8oz plain flour
2/3 tsp baking powder
1/4 tsp salt
Beat the sugar and butter together until well combined, and light and fluffy. Then beat it a bit longer. Just for fun.
Mix in the egg, then the vanilla.
Sift the dry ingredients together over the bowl. Mix to form a loose dough.
Form into a ball, wrap in cling film and chill for a couple of hours.
When firm, roll out on to a VERY WELL floured surface. If you think there's just enough flour on there, sprinkle a bit more on... this is a soft dough and will stick like billy-o.
Dip the cookie cutters into flour before pressing out the shapes.
Line baking trays with a non-stick sheet, and lay out the cookies.
(You can refrigerate again at this point. This stops the cookies from spreading in the oven, and it also means you can get some of the prep done the day before if you need to)
Place into a pre-heated oven (temp 180oC) until lightly golden brown.
When cooked lay them onto a rack to cool completely before icing.


Making the icing - use Royal Icing for this, it contains egg whites so sets beautifully hard and shiny. You could make it from scratch using icing sugar and raw egg whites, or you can cheat and use the boxed Royal Icing, which is so much easier!
Mix the icing with enough water to make a very thick, but still runny paste. This is about 125g icing sugar to 35ml water and a splash of lemon juice. The consistency you need here is runny enough to drip off the spoon in ribbons, but firm enough that the ribbons remain on the surface of the icing (you can just see that in the photo below, these were still here after about a minute)


To colour the mix I've used either colouring gel (this is newish to supermarkets - I used this one.) or regular food colouring (though I don't like these nasty natural food colourings. They all seem quite brown. I miss the vivid and the E-numbers!)
I divided the icing into two bowls, and added 3 drops of red to one to create a pale pink, and three drops of red and 3 of blue to make purple. (My supermarket doesn't stock lovely violet...)

 |
| It is purple, honest! |
This here's my first ever attempt at icing a border on a cookie.
I've used a sandwich bag, and filled one corner with icing. Twist the top of the bag to secure, and squeeze the icing to the bottom of the bag. Trim a TINY (and I mean tiny) point off the bag and start to outline the cookie. The first corner I trimmed was small. But as you can see, not small enough! I got better at it!
Squeeze the bag with a constant pressure, don't drag the icing, but allow it to drop onto the surface.
This isn't quick, and it's not all that fun. Especially when your hands are shaking.

Leave the outline to set for about 5 minutes - when it's dry to the touch you can flood the centre. The icing used to flood is much runnier than the outline icing. This can be spooned in - but don't make it too runny or you can control it. You can use a paintbrush (preferably a clean one!) to manipulate the icing into all the edges. I used an icing stick.

Leave this to set completely if you plan to decorate on the top. This takes hours to go really hard.
These were decorated with the outline consistency icing.
As you can see, I had a great time!
 |
| They're not knickers! |
 |
| Really. Not knickers. |
 |
| Honestly. Not knickers. |
 |
| Can you tell what it is yet? |
 |
| I may have got a little carried away. |


 |
| Tee hee! It's Cookie-Man! |
 |
| See? Not knickers! |
 |

Saturday, 23 March 2013
Sunday Sweets: Chocolate Delights!

Another variation on a theme? From me...? Surely not!
This one is made using the truffle mix.
And it gives me an opportunity to use my chocolate moulds again!
Chocolate delights!
Makes lots!! (40 ish)
You will need...
- 200g White Chocolate
- 200g Dark Chocolate
- 100g Truffle mix (roughly!)
-melt the chocolates separately in bowls over a pan of freshly boiled water
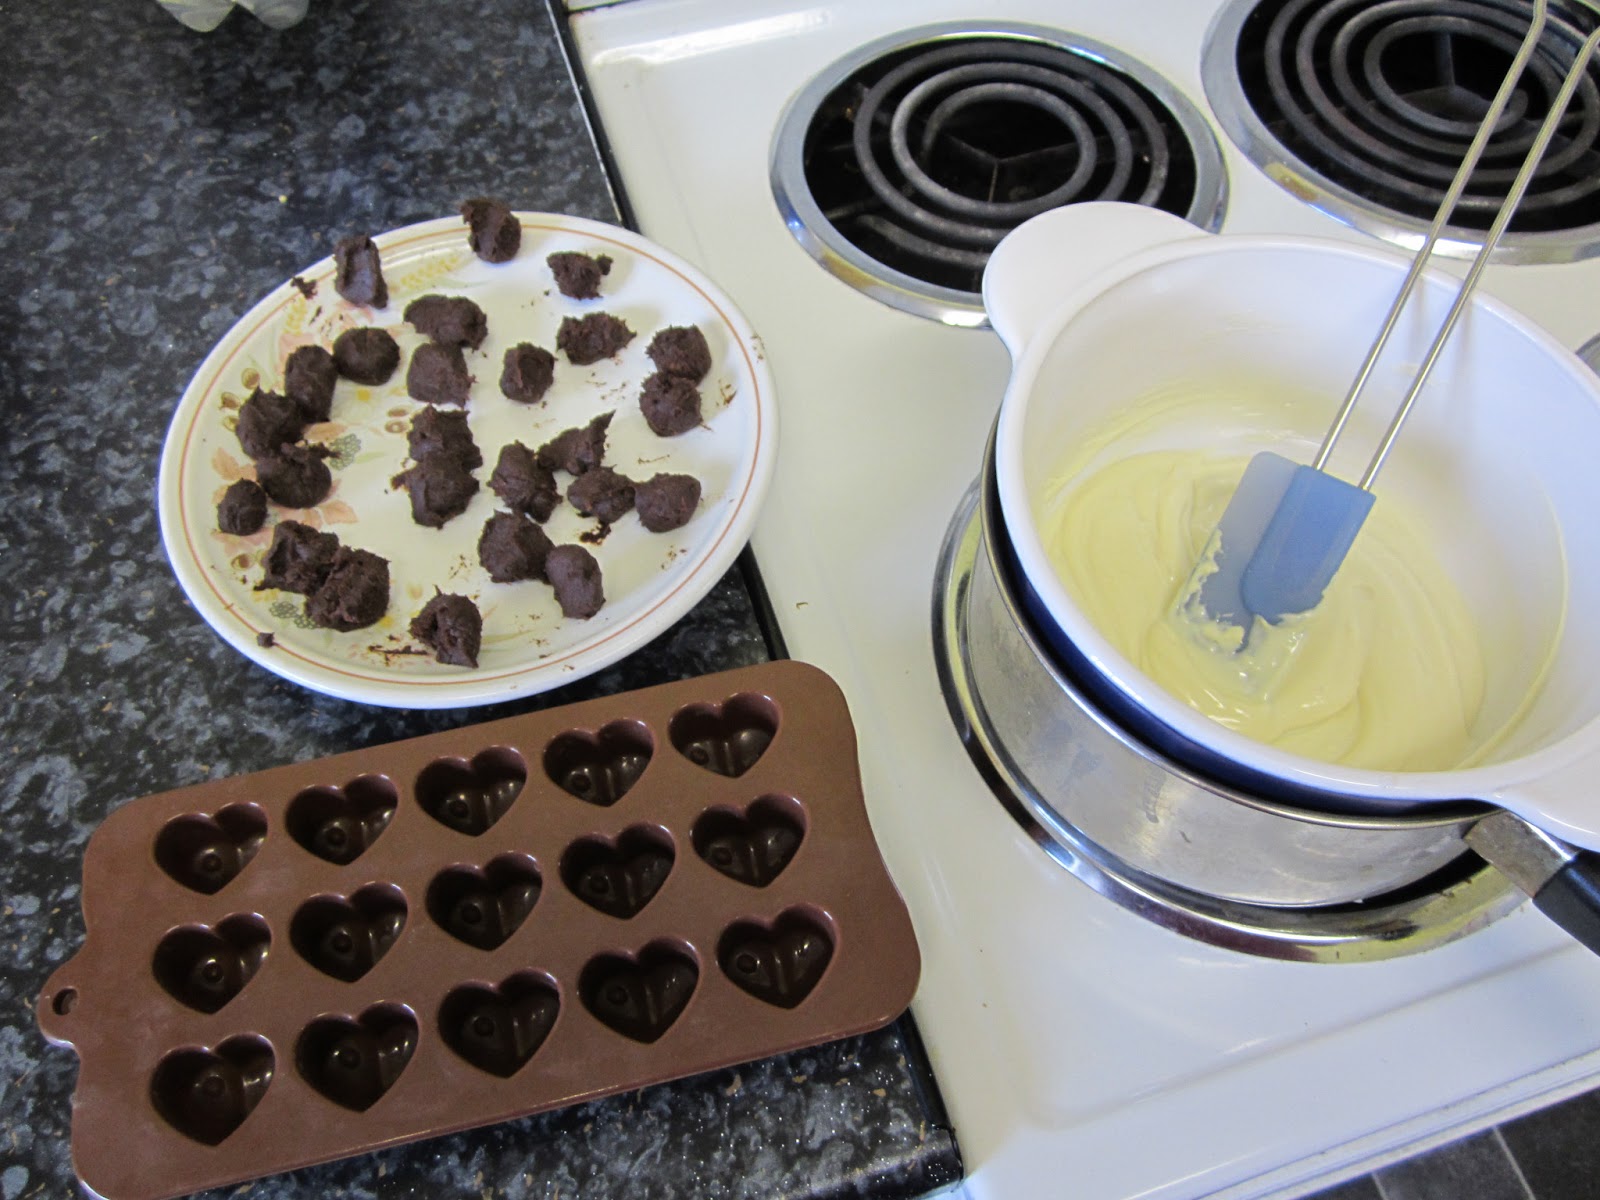 |
| Hmmm... I must've cleaned the oven especially ;-) |
-half fill each of the moulds with melted chocolate; manipulate the bottoms of the moulds with your fingers to ensure there are no gaps. Bang the mould on the counter to remove any bubbles.
-drop a ball of truffle mix into each mould, and top up with more melted chocolate.

-bang the tray on the counter again
-refrigerate until set and turn out


 |
| ooooh, a pretty stripey one! |
Sunday, 17 March 2013
Sunday Sweets: Chocolate Lollipops
An absolute cheat of a recipe...! It's jazzies on sticks...
But this time they're lovely perfect circles, made courtesy of my shiny new macaroon mat (which should've been showcased ages ago, but I got distracted by Jeremy, I'm afraid)

But this time they're lovely perfect circles, made courtesy of my shiny new macaroon mat (which should've been showcased ages ago, but I got distracted by Jeremy, I'm afraid)
 |
| An impulse purchase from QVC... |
You will need - Chocolate and sprinkles.
And lolly pop sticks.
Melt the chocolate in a bowl over a pan of simmering water.
Spoon the melted chocolate into the circles on the mat.
Dip a stick into the melted chocolate before laying it on the circle.
Drip a little more chocolate over the stick and wiggle it to ensure it's completely covered.
Sprinkle with sprinkles.
Allow to set.

.JPG) |
| Hundreds and thousands |
.JPG) |
| Sugar Strands |
.JPG) |
| Chopped hazel nuts |
.JPG)
.JPG)
Sunday, 11 November 2012
Sunday Sweets: Fudge
This is *supposed* to be a really simple recipe... This was my second attempt after ruining a saucepan the first time!!
I changed the recipe for the second batch. I also made a small batch since I no longer have a large enough saucepan to make lots!
This is what I used:
150ml evaporated milk
175g granulated sugar
50g margarine
1 tsp vanilla essence
-Start by greasing a 7inch square baking tin, and lining with a strip of greaseproof paper (this will make it easy to lift the fudge out later)
-Heat the evaporated milk, sugar and margarine in a large heavy based saucepan, until the sugar has dissolved and the marg has melted. Stir to combine.

-Bring the mixture to the boil and boil for 15-20 minutes, stirring all the time to prevent the sugar burning on the bottom of the pan. This stage is quite dramatic and bubbly. Watch out for splashing, this sugar is rather hot!

-When the mix reaches 116oC on a sugar thermometer (the soft ball stage) remove from the heat - keep stirring vigorously so the sugar doesn't catch on the bottom... let cool slightly and add the vanilla and stir again.

-Leave to cool for 5 - 10 minutes
-(here's where the hard work begins) Beat the mixture with a wooden spoon until it thickens and loses its shine


-Pour the mix into the tin, and flatten with a spatula. Leave to set at room temperature.

-Once set cut into chunks, and store in an airtight container
I changed the recipe for the second batch. I also made a small batch since I no longer have a large enough saucepan to make lots!
This is what I used:
150ml evaporated milk
175g granulated sugar
50g margarine
1 tsp vanilla essence
-Start by greasing a 7inch square baking tin, and lining with a strip of greaseproof paper (this will make it easy to lift the fudge out later)
-Heat the evaporated milk, sugar and margarine in a large heavy based saucepan, until the sugar has dissolved and the marg has melted. Stir to combine.

-Bring the mixture to the boil and boil for 15-20 minutes, stirring all the time to prevent the sugar burning on the bottom of the pan. This stage is quite dramatic and bubbly. Watch out for splashing, this sugar is rather hot!

-When the mix reaches 116oC on a sugar thermometer (the soft ball stage) remove from the heat - keep stirring vigorously so the sugar doesn't catch on the bottom... let cool slightly and add the vanilla and stir again.

-Leave to cool for 5 - 10 minutes
-(here's where the hard work begins) Beat the mixture with a wooden spoon until it thickens and loses its shine

-Pour the mix into the tin, and flatten with a spatula. Leave to set at room temperature.

-Once set cut into chunks, and store in an airtight container
Saturday, 15 September 2012
Sunday Sweet: Chocolate Orange Hearts
A variation on another theme!

Heart shaped truffles!
Ingredients:
200g chopped dark chocolate
30g butter
60ml single cream
1tsp orange essence

-Place the chopped chocolate into a heat proof bowl
-Melt the butter into the cream, in a saucepan over a hob, and heat until *just* boiling
-Add the orange essence to the hot mix and stir
-Pour the hot cream mix over the chocolate
-Let the cream begin to melt the chocolate before stirring thoroughly until nice and glossy
-Pour the mix into chocolate moulds (or a pretty looking ice cube tray)

-Level the mix with a pallet knife

-Leave to set in the fridge
-Turn out from the mould and put in pretty little cases!


Sunday, 19 August 2012
Sunday's Sweets - Jazzies
I've been working through my sprinkles collection. I seem to be hoarding them somewhat...
So today I decided to make some jazzies. These are ever so simple, and really cheap to make (if you use cheap chocolate, obviously!)

Break up the chocolate and place in dish on top of a bowl of boiled water. Leave the chocolate to melt for about 8-10 minutes.
Stir the chocolate well to make sure it's smooth and runny.

Take half teaspoons of the melted chocolate and drizzle onto a baking tray lined with parchment.

Using the back of a metal spoon gently smooth out the chocolate into a circle about the size of a pound coin
Scatter the sprinkles over the chocolate

Refrigerate for 15 minutes
Easy-peasy!
This made about 30 sweets of this size.
Make them bigger and thicker, and put a lolly stick on them while they're still melted and make chocolate lolly pops.
Melt chocolate into a shaped mould and sprinkle them for fancy looking sweets.
And if you're a purist, and want proper jazzies, uses hundreds and thousands (they're easier to sprinkle as well!)
So today I decided to make some jazzies. These are ever so simple, and really cheap to make (if you use cheap chocolate, obviously!)

- 100g bar value chocolate
- 20g (more or less) of sprinkles
Break up the chocolate and place in dish on top of a bowl of boiled water. Leave the chocolate to melt for about 8-10 minutes.
Stir the chocolate well to make sure it's smooth and runny.

Take half teaspoons of the melted chocolate and drizzle onto a baking tray lined with parchment.

Using the back of a metal spoon gently smooth out the chocolate into a circle about the size of a pound coin
Scatter the sprinkles over the chocolate


Refrigerate for 15 minutes
Easy-peasy!
This made about 30 sweets of this size.
Make them bigger and thicker, and put a lolly stick on them while they're still melted and make chocolate lolly pops.
Melt chocolate into a shaped mould and sprinkle them for fancy looking sweets.
And if you're a purist, and want proper jazzies, uses hundreds and thousands (they're easier to sprinkle as well!)
Sunday, 15 July 2012
Sunday's Sweets - Rum Truffles

Rum Truffles

200g Dark Chocolate
60ml Single Cream
30g Butter
1tsp Rum Flavouring (adjust to taste!)
Pot of chocolate sprinkles
-Chop the chocolate into small pieces, and place in a large heat proof bowl.
-Heat the cream and butter together in a small saucepan and stir regularly. The mixture should be very hot, but don't let it boil!
-Pour the hot liquid over the chocolate. The heat from the cream will melt the chocolate

-Stir together gently until smooth and glossy. Add the rum flavouring and stir again.

-Leave the mixture to cool slightly before refrigerating for at least two hours.
-Remove from the fridge for about 30minutes - just to soften slightly; it's too hard to work straight off.
-Pour the chocolate sprinkles into a saucer
-Using a pair of teaspoons scoop out dollops of mixture, and form into balls with your hands.
-Roll the balls in the sprinkles until they're well coated. (it helps if the ball is freshly rolled when you do this part - They're stickier then!)
- Pat the sprinkles into the surface, and place the truffle into a petit fours case

This recipe makes between 20 and 30 truffles, obviously depending on how big you make them...
If (for some bizarre reason) you're not going to eat them immediately keep them refrigerated, but for no longer than a week.
The recipe book suggested using 1 tsp of rum, but I found that didn't taste very rummy! So I either use more rum, which risks making a very wet mix, or using the rum flavouring, which is more intense.
- It's easy to make other varieties of truffle. Orange flavoured ones are always lovely.
- Try some mint, that would work well with dark chocolate
- White chocolate and brandy was very popular, but be warned! White chocolate cannot be substituted in place of the dark. Since it has less cocoa solids (no cocoa solids?) it reacts very differently. You need far more chocolate, and less cream.
Subscribe to:
Posts (Atom)