I was trawling through Amazon recently, when I came across this magnificent looking beast of a cake tin:
You can buy it here. If you want. I guess...
I was mighty tempted by this - but I am highly skeptical that it would actually work as well as they've shown. For a start, when you pull out the divider from each tin won't it start to mix?You'd never get those nice straight lines, would you? And that looks like the devil to fill with cake mix. Look that those retaining arms on the divider. Hmmm. I'm not convinced.
So I decided to make my own. I did plan on buying large cookie cutters to make it nice and easy, but thought I'd try it free hand to see if the concept would work. Anyway... This is what happened.
-Start with a traditional sponge mix - 4 eggs: 8oz caster sugar: 8oz marg: 8oz SR flour: 2tsp vanilla extract
making up the recipe as usual. (Oh, and you'll need butter cream icing. Lots of it...)
-Divide the mix into two, putting half the vanilla mix into a lined cake tin, and mixing an additional 1tbsp cocoa powder and 1 tbsp milk to the remaining batter before pouring that into a second lined cake tin.
-Bake at 180oC for 40 minutes (or so) until cooked.
-Allow to rest for 10 minutes before placing on a wire rack to cool completely
-Find the centres of the cakes, and mark with a cocktail stick
-Cut a circle out of the middle of the cake - the size of the circle should be one third of the total size of the cake, for example the centre circle of a 9inch tin would be 3inches in diameter. I used an 8inch tin, just to make things difficult... you could measure accurately using the tape and stick like a pair of compasses. I used a glass of almost the right size to make an indentation on the cake before cutting. Here's where cookie cutters would have been extremely useful!!)
-Cut the cake straight down, and not at an angle.
-Repeat with the second cake, measuring out the second circle with a diameter of two thirds of the total cake size (eg 9inch cake, 6inch circle)
- Carefully separate the circles of cake (the outer cake with be quite floppy, so be gentle with it!), and to make sure it fits, reassemble the bits so that each cake now has alternating rings.
-Trim with a bread knife to level the cake
-To keep the cake from falling to pieces when sliced, glue the rings of one layer of cake with chocolate butter cream icing (this gets very messy... )
-Completely cover the top of this layer with more butter cream
-Place the other ring of the next layer onto the top of the cake, and spread with butter cream
-Assemble this layer as before, sandwiching the rings with yet more butter cream
-Cover the whole cake with (yes...) more butter cream. (I did two layers here - a thin layer to begin with. Leaving to set for at least half an hour before applying the second layer. This makes it easier to get a nice finish - it traps any loose crumbs in the first layer as well)
-
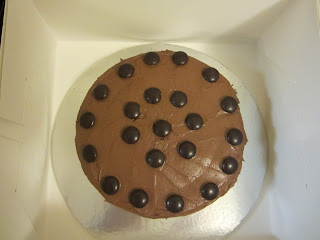
-Using a palate knife, level off the top, or decorate with swirls, and adorn with chocolates
-mmmm!
And here's what it looks like inside!!
Improvements:
Yes, the checker board cake tin would eliminate the messy sandwiching of the rings. And it wouldn't fall apart when you slice it up... It would also save time with the cutting and re-assembling, but I don't know if it would have as good a result. I've seen some wobbly looking pictures online.
But definitely cookie cutters would help with this. It would make a better fit between the rings (I suffered with gapping. But I filled it with more butter cream, and no one seemed to notice...)
I'll certainly try it again. With more layers! And more colours!


No comments:
Post a Comment